Beetroot
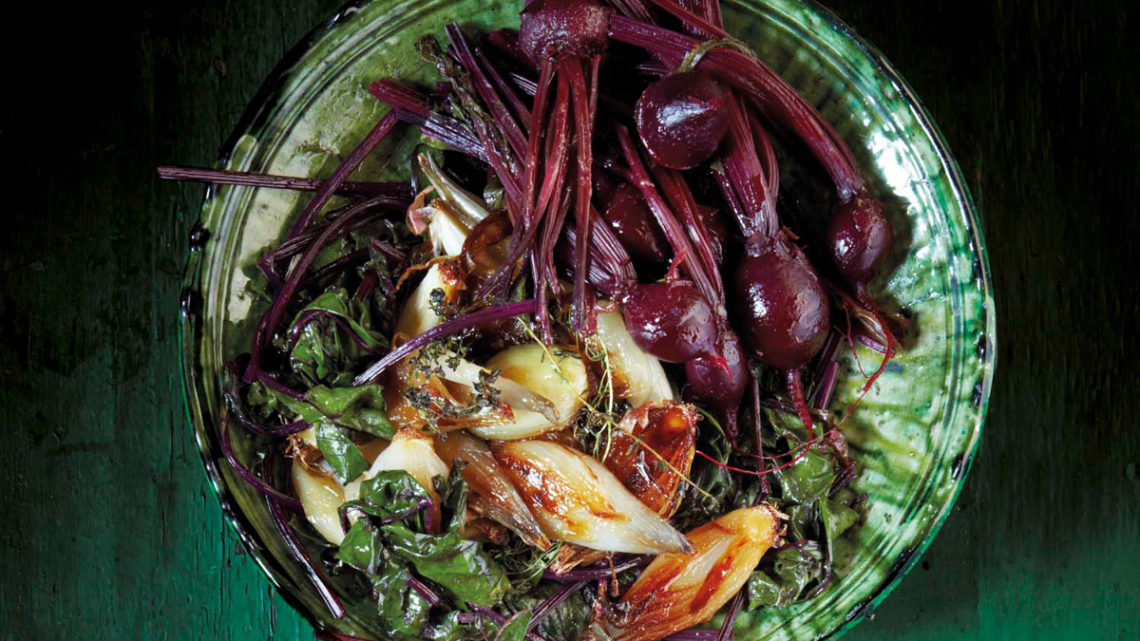
Beetroot, freshly harvested, are super-sweet, ready to eat after boiling for a much shorter time and just delicious without anything added. The balance of the sweetness and almost liquorice lingering aftertaste is amazing.
This is a two-in-one vegetable because the young leaves and the root are both edible. In the old days, beetroot was quite ordinary – cooked and served as a salad with sweet vinegar, or commercially pickled, causing everything else on the plate to turn red.
Nowadays, however, the humble beetroot has reinvented itself. It’s trendy for good reason: its health benefits are numerous (beetroot is a rich source of nutrients), and its versatility makes it ideal for use in all types of cuisine. Different varieties of beetroot now being cultivated are still finding their way into the market. Even the young leaves can be steamed or boiled – they have the taste and texture of spinach.
BEETROOT FOR BREAKFAST
- in a fresh juice with ginger and fresh apple
- in a beetroot soufflé with melting Gorgonzola
- scrambled eggs on toast with beetroot chutney
BEETROOT IN A SALAD
- cook with roasted butternut and toasted pumpkin seeds; serve with a cinnamon and balsamic reduction dressing
- cook and slice with pitted fresh cherries, raspberries, sliced baby radish and red basil; toss with walnuts and a walnut dressing
- cook and grate over a potato salad with a mustard and lemon vinaigrette
- top julienned fresh carrots with fresh julienned beetroot and thinly sliced shallots; serve with an orange and dill dressing with grated orange rind
- cook and top with rocket and an anchovy dressing
BEETROOT FOR LUNCH OR DINNER
- cook and bake in a quiche with prosciutto, Parmesan and caperberries
- cook and peel whole beetroot while still warm; serve with Boursin, toasted pine nuts and pomegranate syrup, seasoned with salt and freshly cracked black pepper
- cook or pickle as part of a beef or ostrich burger with a generous dollop of beetroot and onion chutney
- top a carpaccio of raw beetroot with lightly smoked grilled trout; serve with a horseradish dressing and warm crusty bread
- slice beetroot on a toasted baguette with ham and melting Brie; top with a beetroot pickle
- as a warm creamy soup with lightly smoked mussels
- in a risotto with star anise and shaved Parmesan
- as part of a vegetarian lasagne, using only cooked sliced beetroot and steamed beet greens with sautéed red onion and béchamel sauce; top with Gorgonzola and Parmesan
- roast and serve with seared duck breast and a ground coriander and orange sauce
PINK BAKING AND COOKING WITH BEETROOT
- add beetroot coulis to your favourite cheesecake recipe
- add grated beetroot to your rich chocolate cake to keep the cake moist and give a dark red colour
- add a little beetroot juice to icing for a pink colour
- add a little beetroot juice when melting white chocolate for drizzling over cake or any baked goods
- add beetroot juice to waffle mixture to make pink waffles
- add a little beetroot juice to cooked rice
- enhance any red or pink colour with beetroot juice instead of food colourant
BEETROOT IS BEST WITH:
PROTEIN: anchovies / bacon, prosciutto, salted pork / smoked fish, trout / venison
PRODUCE: apples / cherries / pears / raspberries / lemons / oranges / cucumber / ginger / horseradish / onions / shallots / potatoes / rocket
HERBS AND SPICES: allspice / star anise / cloves / curry / cumin / mustard seeds / chives / mint / dill / nutmeg / curry leaves / parsley / tarragon / watercress / radicchio
CONDIMENTS: mustard / vinaigrette / balsamic vinegar / sherry and red wine vinegar / walnut oil / brown sugar / balsamic reduction
DAIRY: butter / cream / crème fraîche / sour cream / Parmesan / Boursin / cheddar / ricotta
NUTS: walnuts
TIP: ABOUT THOSE BEETROOT STAINS…
Beetroot is a water-soluble dye; using hot water will react as a fixative for stronger colour. Use cold water and rub your hands with salt and lemon juice to remove stains on your skin. For stains on fabric, rub raw pear on the mark before washing in cold water. Then wash with soap.
Lemon Cupcakes with Buttercream Icing
This recipe for lemon cupcakes is one that we have adapted from Martha Stewart. It produces light, tender cupcakes with a fragrant lemony flavour. Makes about 24 cupcakes.
Ingredients
3 cups flour
1 tablespoon baking powder
1/2 teaspoon salt
220g unsalted butter, at room temperature
2 cups caster sugar
4 large eggs
finely grated zest of 2 lemons and 2 tablespoons lemon juice
1 teaspoon vanilla extract
1/2 cup natural yoghurt
1/2 cup milk
Buttercream Icing
150g butter, softened
300g icing sugar
1-2 tablespoons milk
¼ teaspoon vanilla extract
Chopped chocolate or other decorations to garnish. Our favourite is to use different flavours from Tony's Chocolonely.
Method
Preheat an oven to 160C. Line a muffin or cupcake tin with paper cases. Mix together the flour, baking powder and salt.
Using an electric mixer, cream the butter and sugar together until pale and fluffy. Add the eggs, one at a time, beating until each is incorporated. Beat in the lemon zest and vanilla. Add the flour mixture in batches, alternating with the yoghurt, milk and lemon juice. Beat until just combined.
Divide the batter evenly among the cupcake cases, filling them about 3/4 full. Bake for about 25 minutes, rotating the tins halfway until the cakes are golden brown and a skewer inserted into the centre comes out clean.
Transfer to wire racks and cool completely before icing. The cupcakes can be stored in an airtight container of frozen.
For the buttercream, beat the butter in a large bowl until soft. Add half of the icing sugar and beat until smooth.
Add the remaining icing sugar and one tablespoon of the milk and vanilla extract and beat the mixture until creamy and smooth. Beat in the remaining milk, if necessary, to loosen the mixture.
Spread the icing over the cupcakes using a knife or small palette knife. Top with the chopped chocolate or other decorations of your choice.
Easy Cinnamon Buns
Cinnamon buns are everywhere at the moment. It takes time and patience to make your own which is definitely worth. However, we're all often short of time. If you want a quick fix but haven't go the time, try these easy cinnamon buns with ingredients available at any store.
Makes 12 buns
Ingredients
240 g can ready-made croissant dough
50g unsalted butter, softened
2 tsp cinnamon
6 tbsp soft dark brown sugar
Method
Heat oven to 170C. Line a 20cm cake tin with a square of baking paper so the corners stick up (this will help you to lift the buns out).
Unroll the croissant dough from the can and lay it out on your work surface. Cut it into three sections along the dotted lines, but don’t cut the diagonal line. Spread over half of the butter.
Mix the cinnamon and sugar together. Using one square of dough at a time, sprinkle over 2-3 tsp of the sugar and roll up the dough. When you have three rolls, cut each one in half and then each half in two. Arrange the rolls in the tin – they will rise and spread a little. Stick the end bits in among fatter pieces from the centre of the rolls so they cook evenly. Bake for 15-18 minutess or until the buns are risen and cooked through.
Meanwhile, heat the remaining sugar-cinnamon mix with the remaining butter until you have a thick caramel (don’t worry if some of the butter separates out, it will soak into the dough). If it's too grainy, add a little boiling water from the kettle to the it down and smooth it out.When the buns are cooked, brush over the caramel. Leave to cool a little, then eat warm.
Mama Bakery
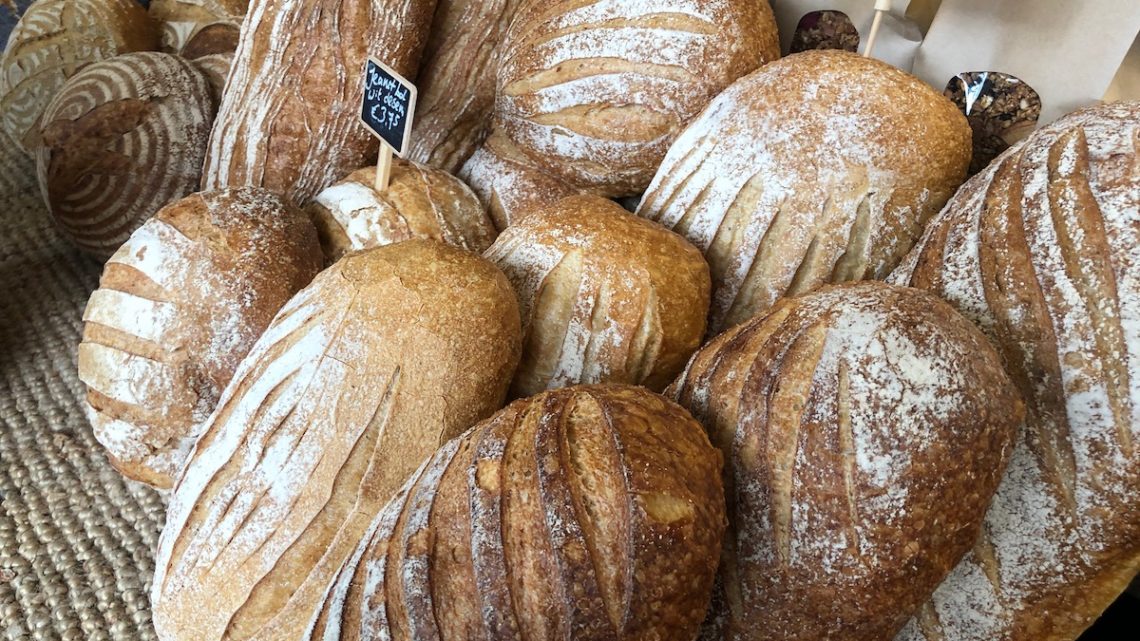
Mama Bakery produces organic artisan bread and pastries. A small team of dedicated bakers and patissiers work with love and passion.
We have an old colleague who manages their kitchen, so when we heard they have a stall at the Zuidermarkt every Saturday, we decided to go and see for ourselves. We didn't require much convincing because all their products are made using the best quality ingredients, such as flour from Dutch mills. All their goods are baked to perfection.
You can either go and visit them at their stall at the Zuidermarkt each Saturday, just as we did, or if you're willing to travel a little further, you can visit their bakery and store in Zwanenburg.
Tuscan Bread
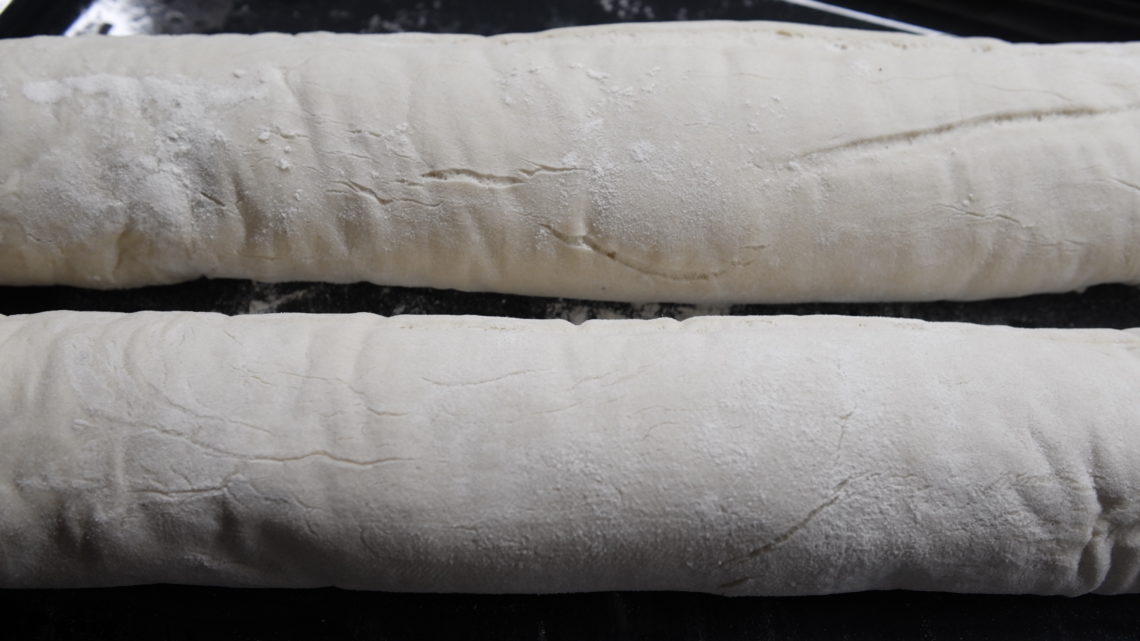
The first time you try Tuscan bread, it feels like someone must be playing a joke. This bland-tasting, pale-crusted bread surely can’t be right. But Tuscan bread it is! In fact, the bread is (quite deliberately) missing one key ingredient.
Tuscan bread is intentionally made without or with very little salt. Tuscan bread not only lacks depth of flavour without salt, the crust also doesn’t brown and the structure is much more delicate.
Salt-less Tuscan bread is really not intended for eating on its own. It’s usually served along with the main meal and is meant for sopping up thick, rich sauces. The bread doesn’t compete with the flavours in the dish, and both are enhanced.
1st Fermentation
35 g yeast
1 Tbsp flour
125 ml lukewarm water
1250 g flour
500 ml lukewarm water
pinch of salt
Method
1
1st fermentation – Dissolve the yeast in 125 ml lukewarm water. Add 1 tablespoon flour and leave to rise.
2
Place the flour in the bowl of a mixer, add the fermented mixture and the remaining 500 ml water. Add a little more water if necessary to get a soft but not sticky dough.
3
Mix all together and knead for 5 -10 minutes to a small ball.
4
Shape into an oblong and wrap in a cloth dusted with flour, leave to rise for 1 hour.
5
Carefully remove the bread from the cloth and place in a baking tray dusted with flour.
6
Bake in an oven, preheated at 180°C for about 50 minutes.
Pear bread
600 g - 1kg strong white bread flour
1 x 7 g sachet of dried yeast
300 g strong white bread flour
350 g strong white bread flour , plus extra for dusting
oil , for greasing
- For the starter, combine 200g of the flour with 200ml of lukewarm water in a non-metallic container – a glass jar is perfect. Leave it somewhere warm uncovered overnight.
- The following day, feed it by discarding half and adding a further 100g of flour and 100ml of lukewarm water.
- Repeat this feeding process each day until you see bubbles throughout the mixture (this is where a glass jar comes in handy). It will take a few days, possibly more, for the mixture to pick up the natural airborne yeasts and really start living. Don’t lose hope, it will happen!
- Removing 100g of the starter to make your loaf, chill the rest, covered but with a hole for it to breathe. You’ll need to feed this once a week – bring it up to room temperature first, allow it to bubble up, then recede (somewhere warm) for 30 minutes to 1 hour, then return it to the fridge within an hour or so. A liquid layer may develop on top, called hooch; stir it in if you like, or pour it off.
- To make the sponge, bring the 100g of starter up to room temperature.
- Combine the 300g flour and ½ teaspoon of sea salt in a bowl, then add 300ml of warm water and the starter.
- Cover with a towel and leave it to rise somewhere warm for 3 to 4 hours, or until doubled in size.
- In the meantime, top up the starter with 50g of flour and 50ml of lukewarm water (the weight you removed), allow it to bubble up and down as in step 3, then return it to the fridge.
- Either use your sponge straight away or chill it, covered, overnight.
- Now to make the sourdough bread. Bring the sponge up to room temperature (if needs be), combine it with the flour and 2 teaspoons of salt, then turn it out onto a floured surface.
- Knead for 10 minutes, or until smooth and elastic. Put the dough in a lightly oiled bowl, cover and leave to rise in a warm place for 2 to 3 hours, or until doubled in size.
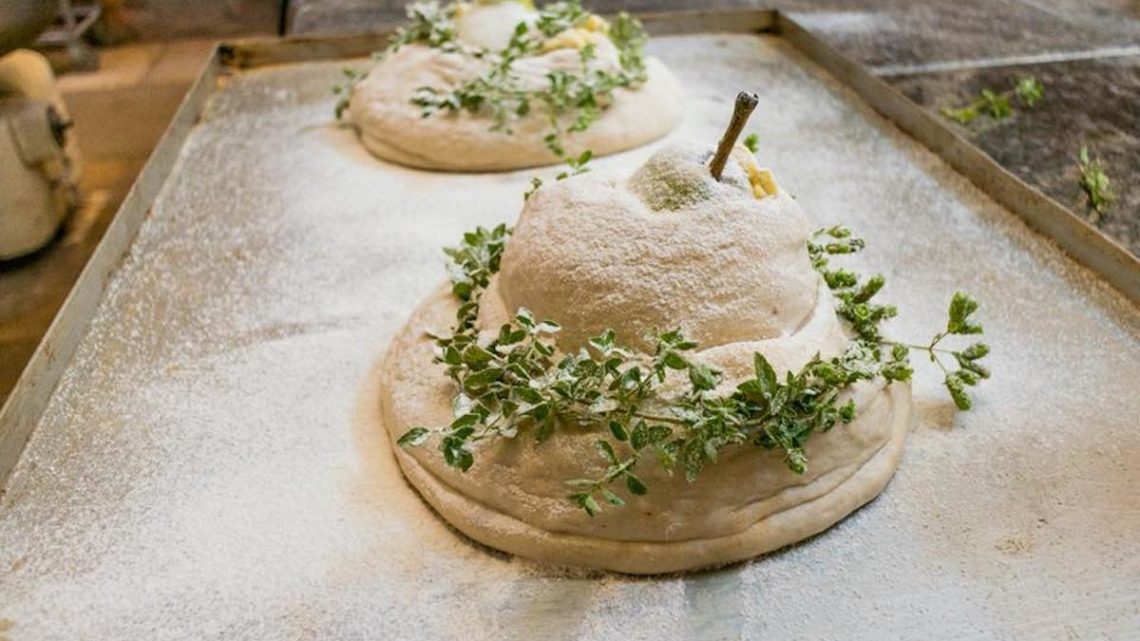
- Tip the dough onto a floured surface, knock out the air, then shape it into a round loaf, placing the pear inside on an oiled baking sheet.
- Wrap the thyme around as crown, over and prove for about 1 hour in a warm place, or until it doesn’t spring back when prodded.
- Preheat the oven to 220°C.
- When the dough is ready, place a tray of water in the base of the oven (this will help it develop a good crust) and score the top of the loaf with a sharp knife.
- Bake for 30 to 40 minutes until golden and sounds hollow when tapped. Cool on a wire rack.
Delicious served with blue cheese.
Madeleines
Matcha (green tea) Madeleines
Makes about 12
Ingredients
100g caster sugar
100g flour
1 egg
Lemon zest and juice of ½ lemon
¾ teaspoon baking powder
½ teaspoon matcha powder
100g butter and some extra for greasing the tin
Method
1 Preheat oven to 200 C˚. Melt the butter in a small pan and grease the baking tin. Sprinkle lightly with some flour, shaking off the excess. Mix the dry ingredients together.
2 Whisk the eggs and sugar in a bowl until light and fluffy. Fold the dry ingredients carefully carefully through the beaten eggs followed by the melted butter. Let stand for 15 minutes.
3 Fill each mold in the Madeleine baking tin ¾ full with the batter. Bake in the oven for 8-9 minutes or until cooked through. Leave them to cool for 1 minute in the tin and then gently remove. Put them on a rack to cool and sprinkle with icing sugar.
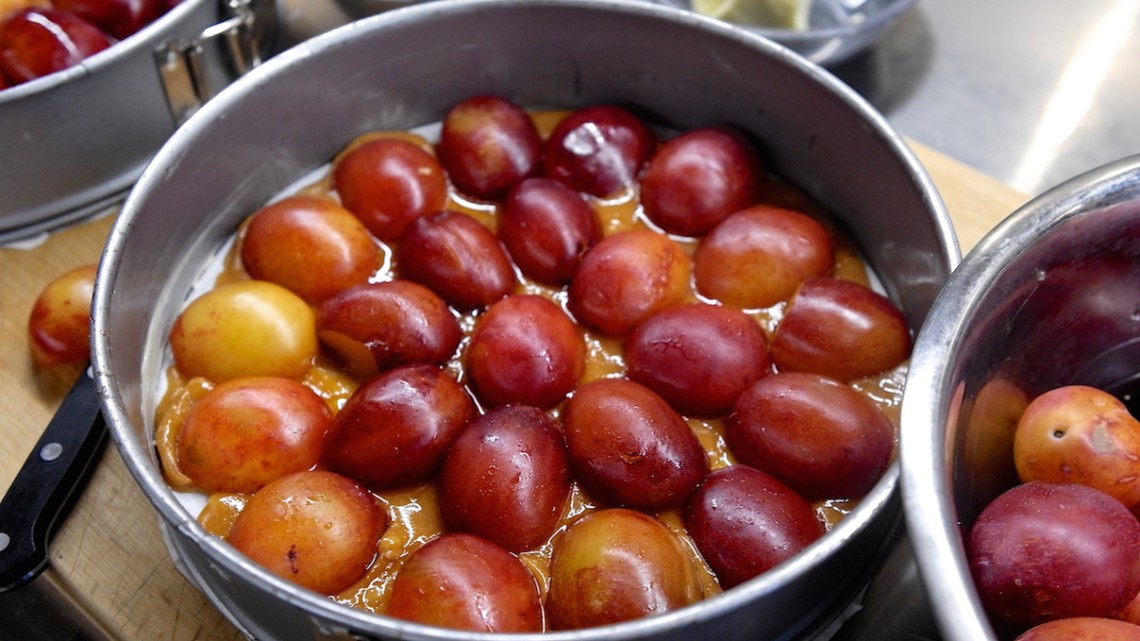
Upside Down Plum Cake
Serves 8-10
Ingredients
500g brown sugar
250 g soft, unsalted butter, chopped
12-15 plums, halved and stoned
4 eggs
2 teaspoons vanilla extract
250 g plain flour
2 teaspoons baking powder
160 ml cream
Method
Combine 300 g brown sugar with 120 g butter in a heavy-based saucepan and stir over low heat until well combined and smooth. Remove from the heat and pour into a well-greased, round, 26cm cake tin, spreading evenly. Place the plum halves on top, cut-side down.
Using an electric mixer, beat the remaining butter with remaining sugar in a bowl until creamy. Add eggs, one at a time, beating well after each, then stir in vanilla. Sift combined flour and baking powder into a bowl with a pinch of salt. Fold dry ingredients into butter mixture, add cream and mix well.
Spoon mixture over plums and bake at 175°C for about 45-60 minutes, or until cooked when tested with a skewer. Stand in tin for 5 minutes before turning out on a plate.
Serve with creme fraiche.
We, the Amsterdam Flavours chefs, hope you enjoy this recipe as much as we do. If you have any questions on how to prepare it or just want to send us your feedback, you can reach us here Contact Amsterdam Flavours
All Butter Croissants
There is nothing better than warm, butter, flakey croissants straight from the oven. Making them yourself takes a little practice, but the results are SO worth it. Serve with farmhouse butter, good jam and a cup of coffee. Heaven!
Ingredients
625g strong white flour, plus extra for rolling out
12 g salt
75 g sugar
40 g fresh yeast
500g butter, chilled
1 egg, beaten
Method
The day before you want to bake the croissants, place the flour, sugar, salt and yeast in the bowl of a mixer fitted with a dough hook, or a large mixing bowl. Pour in 350-400ml cold water and mix until it comes together as a soft dough.
Turn out the dough onto a lightly floured work surface and knead for a good 8-10 minutes, or until the dough feels smooth, stretchy and elastic. Return to the bowl and set aside to rest.
Sandwich the chilled butter between two sheets of greaseproof paper and roll out to a 30x20cm rectangle, about 1cm thick. Chill in the fridge until needed.
Turn the dough out again onto a lightly floured work surface. Roll it into a rectangle 60x30cm. Peel the greaseproof paper from the butter and place the butter centrally on top of the pastry rectangle. Fold one edge of the pastry over the butter to half-cover it, then do the same with the other edge of the pastry so that the butter is covered. Fold the rectangle in half lengthways, then give it a quarter-turn and roll out again to a rectangle measuring 60x30cm.
Repeat the folding, turning and rolling process, as before, three more times (do not roll out the pastry the final time you fold and turn it). Wrap the pastry in cling film and chill in the fridge overnight.
When the pastry has rested, roll it out to a thickness of 0.5cm. Cut the pastry into two 50x20cm strips, then cut each strip into triangles about 10cm wide at the base.
With the narrow point of one of the pastry triangles facing away from you, use your fingertips to stretch the two points of the triangle nearest to you out sideways so that they bow a little. Roll the pastry over itself, curling it into a traditional crescent shape, so that the furthest point of the triangle ends up curled over the top of the croissant. Repeat the process with the remaining pastry triangles to create about 20 croissants.
Place the croissants onto baking trays lined with silicone paper or baking parchment. Brush them all over with the beaten egg, then set aside to prove for 30-45 minutes. (The croissants can be frozen at this point, if desired.)
Preheat the oven to 190C/170C Fan. Bake the croissants for 20-25 minutes, or until risen and golden-brown. Serve warm with jam and butter.
We, the Amsterdam Flavours chefs, hope you enjoy this recipe as much as we do. If you have any questions on how to prepare it or just want to send us your feedback, you can reach us here Contact Amsterdam Flavours
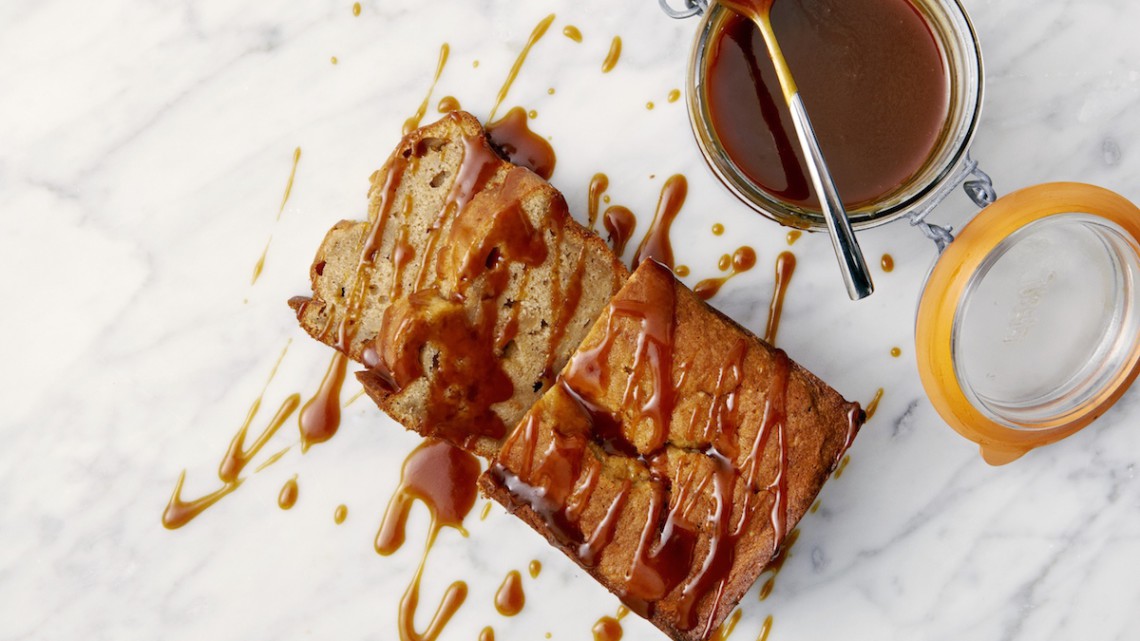
Banana Cake
This cake is the perfect think to make when you have some bananas from the past week which are bit over-ripe. Not only will you be using them up and not wasting anything, but your friends and family will love you for doing so.
Serves 8-10
Ingredients
125 g butter, softened
45 g brown sugar
220 gr castor sugar
3 eggs
300 g plain flour
2 teaspoons baking powder
1 teaspoon ground cinnamon
180 g sour cream
1 cup roughly mashed ripe banana
caramel sauce
Method
Preheat the oven to 180° C. Place the butter, caster sugar and brown sugar in the bowl of an electric mixer and beat until light and creamy.
Gradually add the eggs and beat well. Sift the flour and baking powder over the mixture. Add the cinnamon, sour cream and banana and stir to combine.
Spoon the mixture into a greased loaf tin. Bake for about 40 - 50 minutes or until cooked when tested with a skewer. Cool on a wire rack.
Make the caramel sauce, according to the recipe given. Serve warm drizzled over the cake.
We, the Amsterdam Flavours chefs, hope you enjoy this recipe as much as we do. If you have any questions on how to prepare it or just want to send us your feedback, you can reach us here Contact Amsterdam Flavours

